
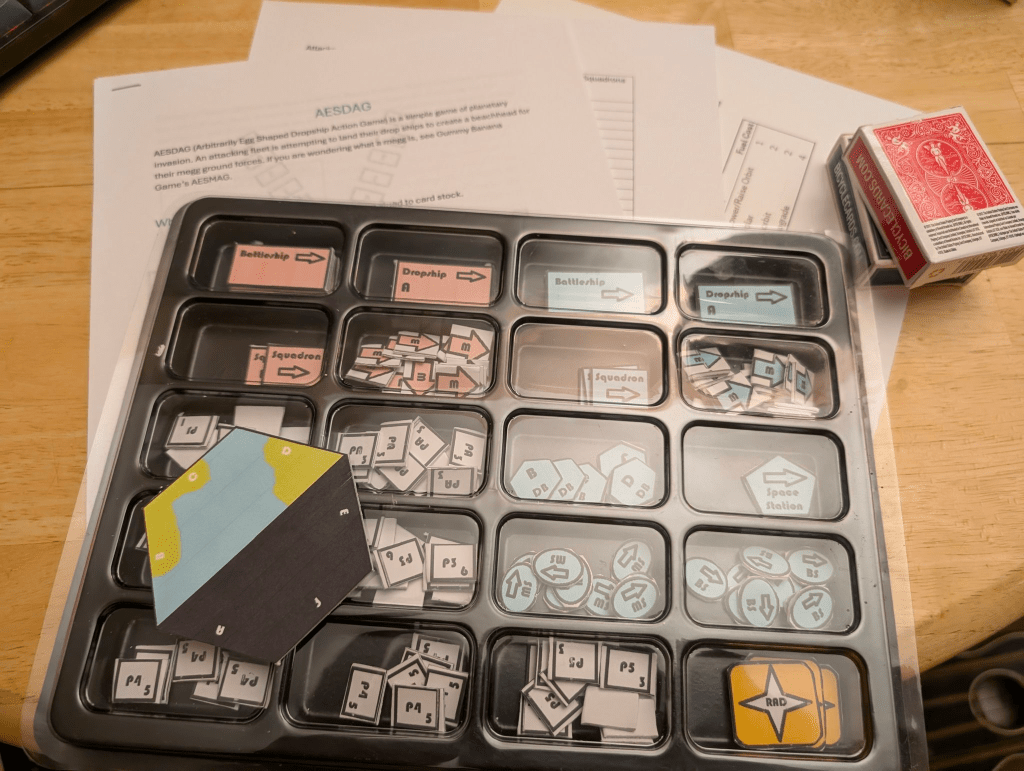
I finally put together a set of draft counters to allow me to playtest the draft AESDAG rules. And, I figure this is as good a place as any to show people some of the conception for the game and how it works. Or, rather, since it is a test, how I hope it will work. In practice, this post will be a step-by-step walk through of playing the game. It may be somewhat incomprehensible as I won’t be explaining every rule. Nonetheless, I hope it may be of interest.
The first step is to determine the attacking and defending units. This is determined through a point buy approach mitigated by a random roll of how many points each side has to spend. This will not necessarily result in balanced scenarios. There is no guarantee that each side has a chance of winning, but the hope is that this will avoid players finding optimal solutions, and that the tactical use of the mechanics of the game may allow for unexpected clever wins of weaker forces over stronger. Who knows though? We need to play it some to see. Of course, the points available and the point values may well change after play testing.
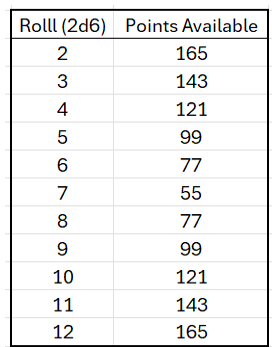
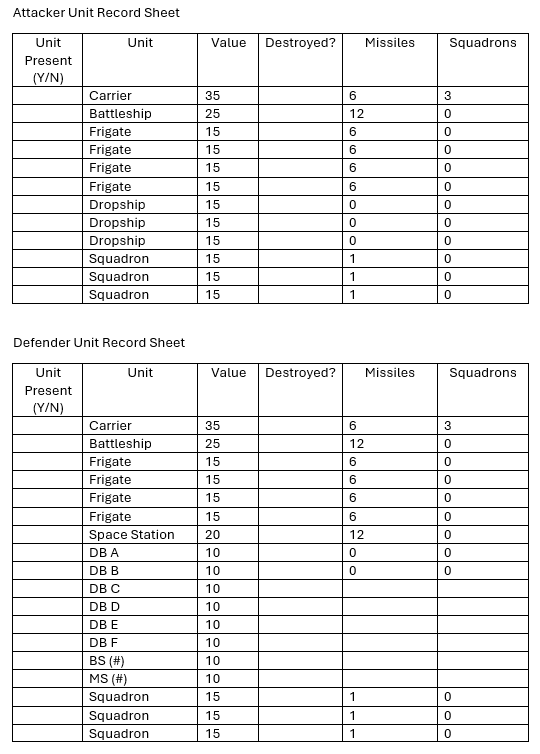
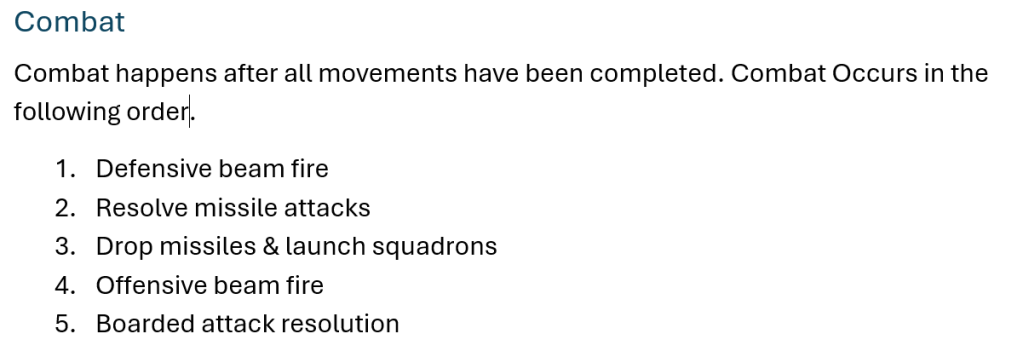
Attacker rolls an eight, 77 points available. Defender rolls a ten, 121 points available. One thing to note is both players are limited by the number of counters available. The result of this is that a player may want to buy more than one carrier or battleship, but there is always only one available. Similarly, the maximum number of drop-ships available is always three.
The attacker chooses to buy three drop-ships and two frigates, leaving two points unspent. The defending player chooses to buy six defense bases, a space station, one frigate, one missile satellite, and one beam satellite, leaving six points unspent.
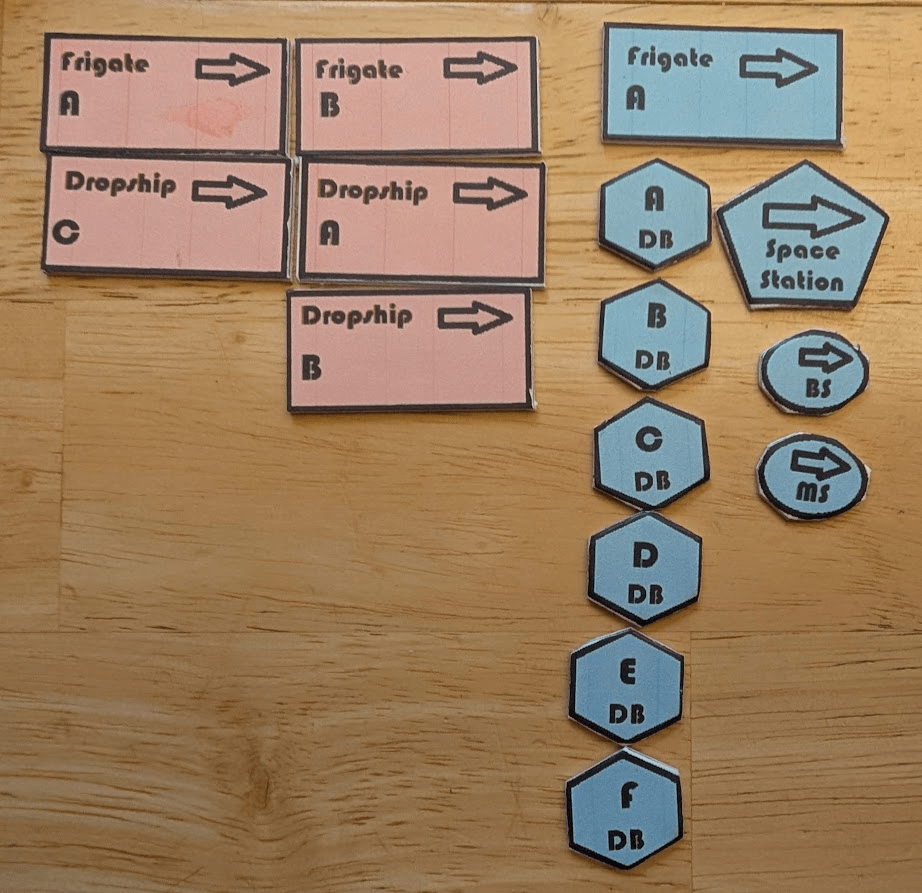
Starting positions
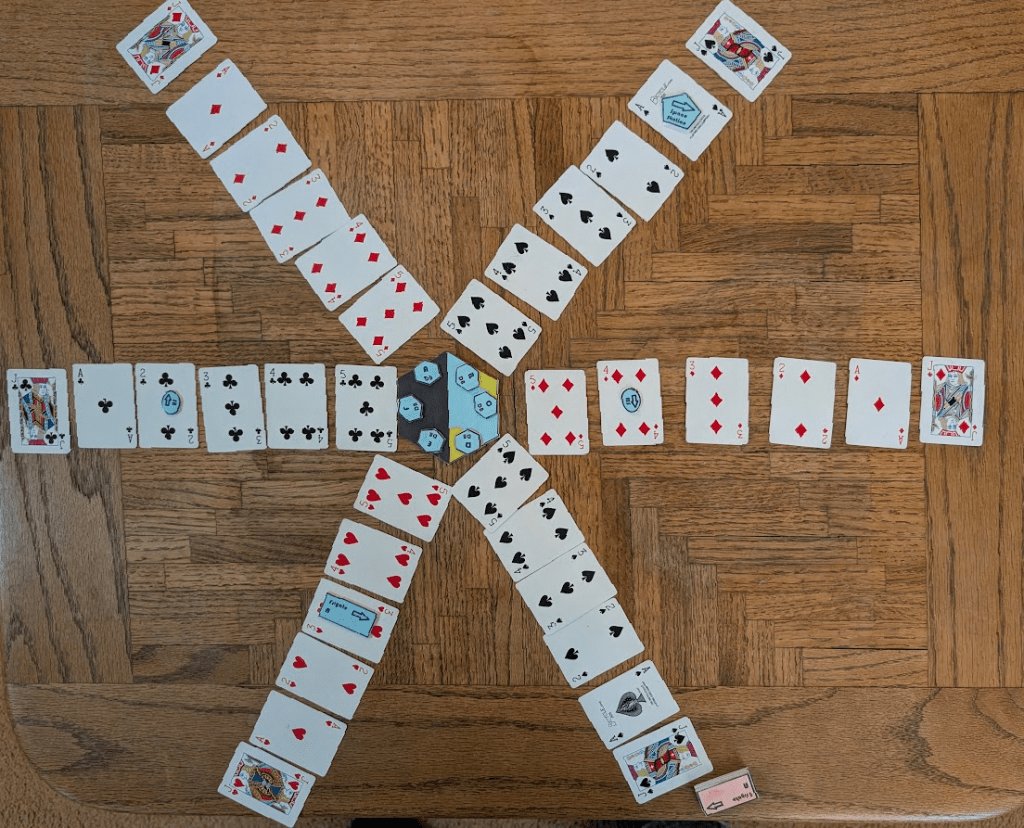
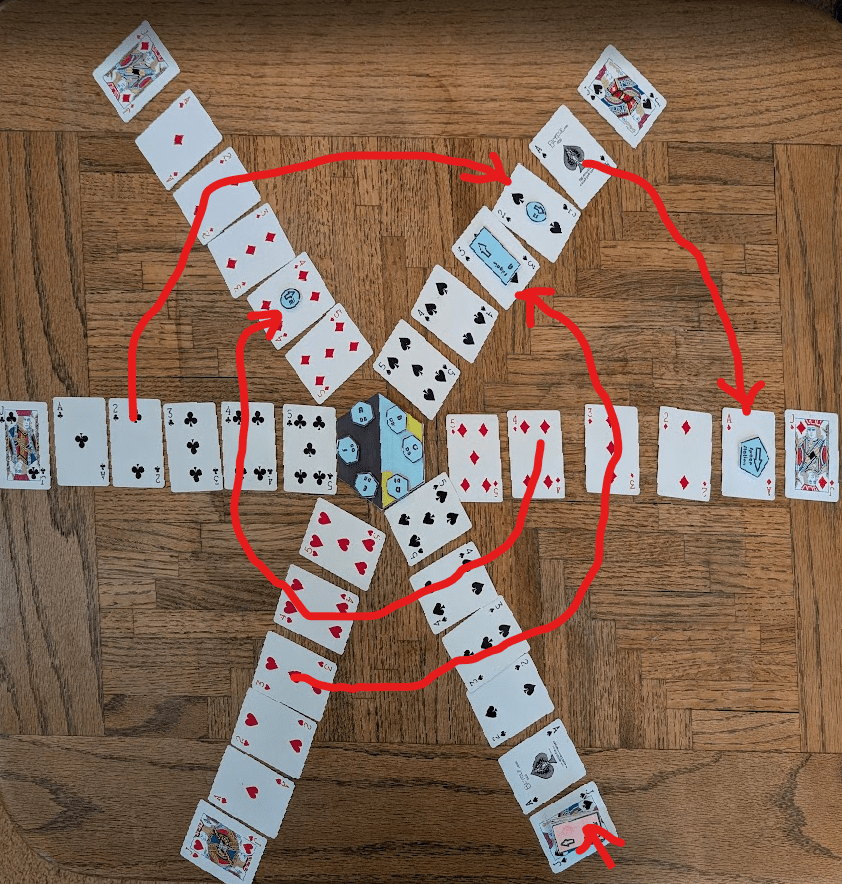
The defending player places his forces first. Satellites (including space stations) can be placed on any orbit card. But, that fixes the orbit height of that unit for the rest of the game. The number on the card is the spaces the unit moves in the direction the arrow is placed. Jacks have zero movement (geosynchronous) and aces are one movement.
The space station is placed on the ace of arm B. The missile satellite on arm C, orbit 4. The beam satellite on arm F, orbit 2. So, the space station will take six turns to complete one orbit. The beam satellite will take three turns to complete one orbit. And, the missile satellite will be zipping by at 1.33 orbits per two turns. The frigate is placed on arm E, orbit 3, but in a retrograde direction.
The attackers choose to come in on arm D in a prograde direction.
First Move
Because the Jack on arm D is undefended, the attacker moves into the geosynchronous position onto the jack. The defender then moves his satellites, then frigate, according to the movement rules. Note, there is no option not to move. Any unit in an orbit must move the spaces required by that orbit. The defending frigate conserves its fuel and conducts no burns.
First Combat
As no missiles are on the table, there is no defensive beam fire this turn, nor any missile attacks to resolve. There are no carriers in this scenario, so no squadrons are available for launch. The frigates and the space station have missiles, as do the missile satellite and the defense bases. This turn only the Space Station chooses to launch missiles. The Space Station dumps all twelve of its missiles. This may be a foolhardy strategy or devastating. We’ll see.
Both the Space Station and the attacking Frigates are capable of offensive beam fire. The Space Station targets a drop-ship. The range is two, making the target needed a 3+ on a d6. The defender rolls a four and hit, then rolls a 5 which from the attack table shows the drop-ship has been destroyed. Now the three frigates fire back at the Space Station. The odds of hitting are the same. Two of the three shots hit. The resolution rolls are a five and a four, resulting in two disabled markers being added to the Space Station. Which reminds me that I forgot to make disabled markers. Put it on the to-do list. That’s the end of the first turn.
Turn 2
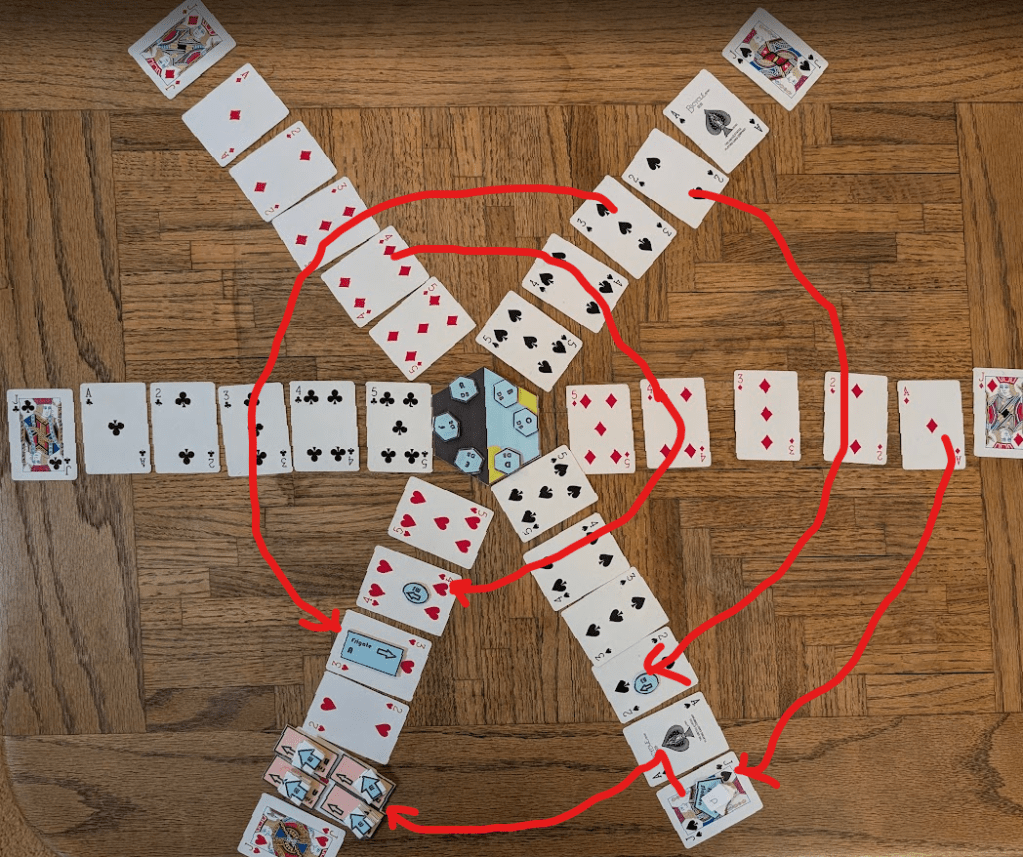
Missile movement comes first. The twelve missiles launched by the Space Station move one for their orbit, then conduct a burn to raise their orbit one. This puts them into the same orbit as the attacking fleet. Each of the four ships is targeted by three missiles each.
The attacking fleet all choose to carry out burns to lower their orbit. They drop to the ace and orbit one space. The Defending frigate carries out no burns and ends up on the same arm as the Attackers, two orbits lower.
Turn 2 Combat
The Attacking fleet conducts defensive fire against the oncoming missiles. With six missiles per counter that is 18 defensive rolls per ship. With a 3+ needed to kill a missile statistically there should be 18 surviving. This does not look good for the attackers. As it was 29 make it through the defenses. Frigate A takes one drive hit. Frigate B is destroyed. The two remaining drop-ships are also destroyed. It’s a disaster.
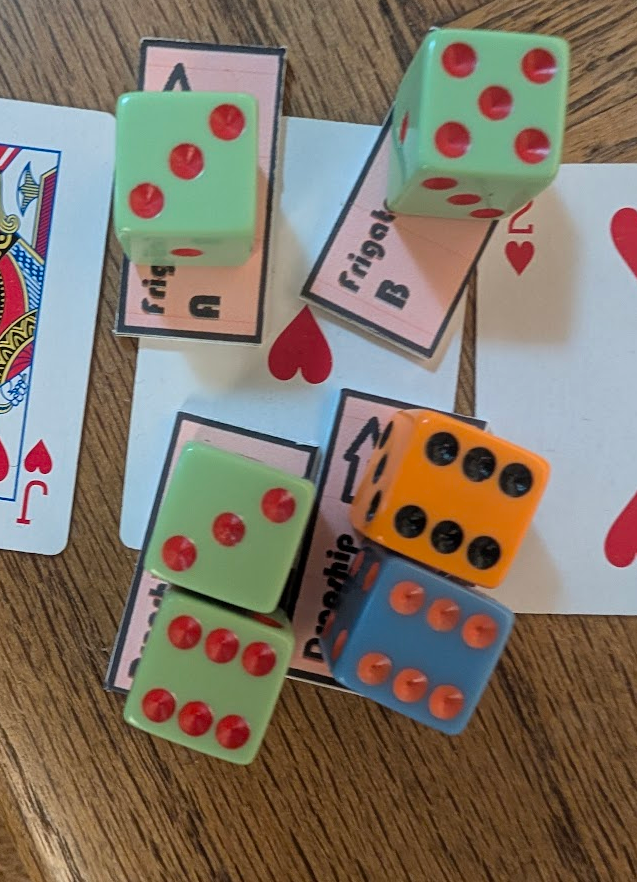
The attacking force, with no remaining drop-ships, loses. The remaining attacking Frigate burns in retreat.
What did we learn?
Initial placement matters a lot. The defending Space Station in orbit 1 (Aces) allows for missile and beam shots early in the game. But, only if the Attacker gives them a chance. If the Attacker had chosen the arm opposite the Space Station, the missiles would not have been able to reach the attacking fleet.
A Space Station is the equivalent of a battleship that cannot maneuver. So, it is best to give them a lot of room. If they’d started with one more arm of displacement then they’d have had a chance to work their way into lower orbits which, overall were lightly defended.
Similarly, a different placement could have avoided the early beam hit as well. Since the attacking fleet only gets to move into geosynchronous orbit the first turn, they would do well to take a close look at where the enemy can move to that first turn.
Well, not the most exciting game ever. But, despite having written the rules, I am still learning the game and potential tactics.


Leave a comment